Here’s our step-by-step guide on how to get your PayPal feed balanced by including historical transactions.
So you’ve gotten your bank account feeds connected to Xero by following the steps in Kayla’s blog here and are now ready to tackle your PayPal account. You will notice when you connect your PayPal feed, it will not pull in all or any of the historical transactions, leaving your balance in Xero way out of whack! No, you are not crazy, there are missing transactions that you will need to pull in manually.
Once you have your feed set-up, the next step is to manually import the historical transactions and this part can be tricky! But have no fear, if you follow these steps you should be well on your way to balancing the account.
Step 1: Login
First you are going to login to your PayPal account. Simple enough!
Step 2: Navigate to Activity
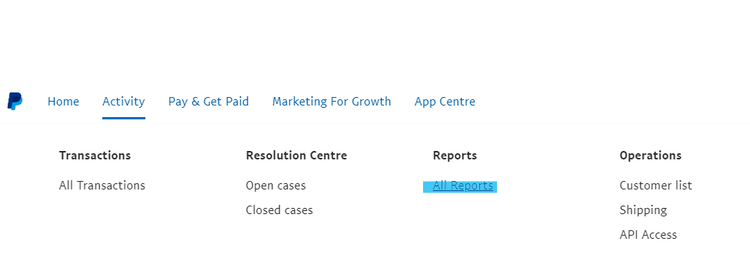
You won’t even need Netscape Navigator to do this. You just want to go to Activity at the top and click the link for All Reports shown below:

Step 3: Download the Report
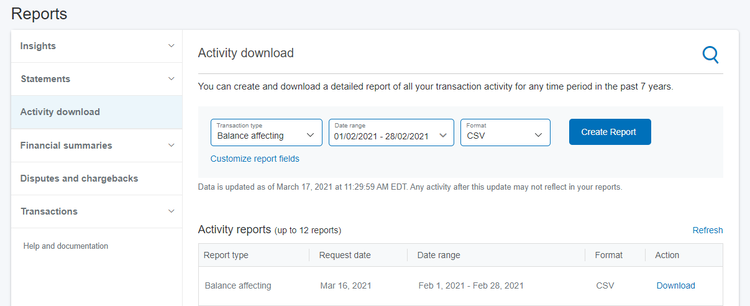
Next step is to go to Activity Download on the left, choose Balance Affecting, select your date range, format CSV and Create Report. The dates of the report will depend on when your transactions started feeding in. You’ll want to pick up where they left off. The key is to pick up all the transactions.
The report will populate below and will show when it is ready for you to download:

Once downloaded, this is when things get tricky. Uploading this CSV directly to Xero will not work correctly unfortunately so we need to do a little formatting first. If there’s anything bookkeepers and accountants know how to do, it’s format a spreadsheet.
Step 4: Hide!
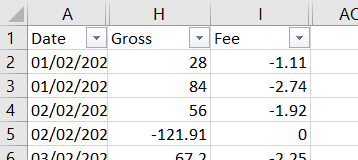
First, you can hide all the columns except the Date, Gross and Fee. This just makes things easier to look at and more simple to copy and paste over. To do this, select the whole column, right click and select Hide.

Step 5: Download the Import Template
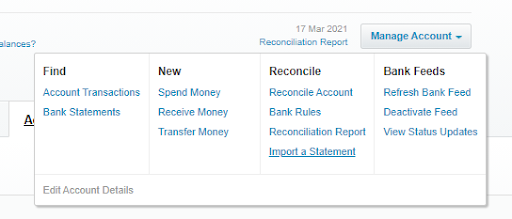
Next you will need to retrieve the CSV template for import from Xero to copy this information onto. You can find it by going to the tab on the top left inside the bank account in Xero and clicking on Import a Statement. There’s a hotlink (so hot!) where you can download the template.

Step 6: Copy and Paste (Or Cut and Paste if You Like Living on the Wild Side)
Once downloaded, copy and paste your date column into the Xero CSV template. Then copy the gross amounts over into the amount column. You should also copy the description and payee over to be imported into Xero as well for reconciling. It should look like this:

Step 7: Add in the Fees
Next we need to add the fees. It’s easiest to copy over the date column a second time under the current transactions, copy the fees column into the amount column below, add Fee as the description and then just remove any $0.00 lines if there are any like shown below:
Unknown block type "blockImage", please specify a serializer for it in the `serializers.types` prop
Once this step is complete, you are ready for import! Xero actually covers this part really well, so we’ll let them take it from here.
Did you know we offer Xero training? Check out our course options here or just reach out and we can give you the run down.


